Welcome to my blog on Stamping and Scrapbooking!

Let's stamp together. Whether you're a customer, a downline member or a stamp site surfer I'm glad you popped into my cyber craft room!
Have a question? Leave a comment. I'll try to address those questions the best I can.

Pages

Thursday, September 9, 2010

Batty for your Fangs

Good morning everyone,

It's Halloween card week and here's another one. This card uses Wicked Fun Designer Series Paper, Old Olive, black, Rich Razzleberry Textured and Cajun Craze cardstock. If you look carefully at the DSP those ore the colors that fleck it so I pulled color out that way.

The sketch is obvious. I creeped up my bat from Batty for You stamp set with black jewels (Holiday Mini) in the eyes.


 Part of the little gluey thing came off with one jewel so he looks like his one eye is all matted up or he's crying. I'll have to clip that off, it bothers me.

The ribbons were Dusty Durango Polka Dot (RET) flipped over, black narrow taffeta, razzleberry grosgrain (1/4 inch) and black lace.
The razzleberry circle was punched with the new large  2 1/2 inch circle punch (Holiday Mini catalog).

This little Fangtastic stamp set with the vampire and witch actually belongs to my son, who scrapbooks too. We started it as art class during homeschool and it became so much more. It's a way for him to articulate his feelings and display emotions, huge in a child with disabilities.

That's it for me! See you tomorrow for another project!
Much love and joy,


http://stampinnscrappinwithkaren.blogspot.com/

Wednesday, September 8, 2010

Wicked Cool Candles

Good morning,

This week is the week of the Halloween card I guess. This one is so easy it's ridiculous. Shimmery White cardstock matted on Basic Black. The base card is Rich Razzleberry. The stamp set is Wicked Cool, the inks are razzleberry and black.

I embellished with two black brads, some jewels from the new catalog and some thin black taffeta from the new catty as well. It was fun and WAAAYYYY easy ;-)


Here's a close up of the brads and jewels.
Have a great day and we'll see you tomorrow.
Much love and joy,


http://stampinnscrappinwithkaren.blogspot.com/

Tuesday, September 7, 2010

Spider Web Halloween Card

Good morning everyone!

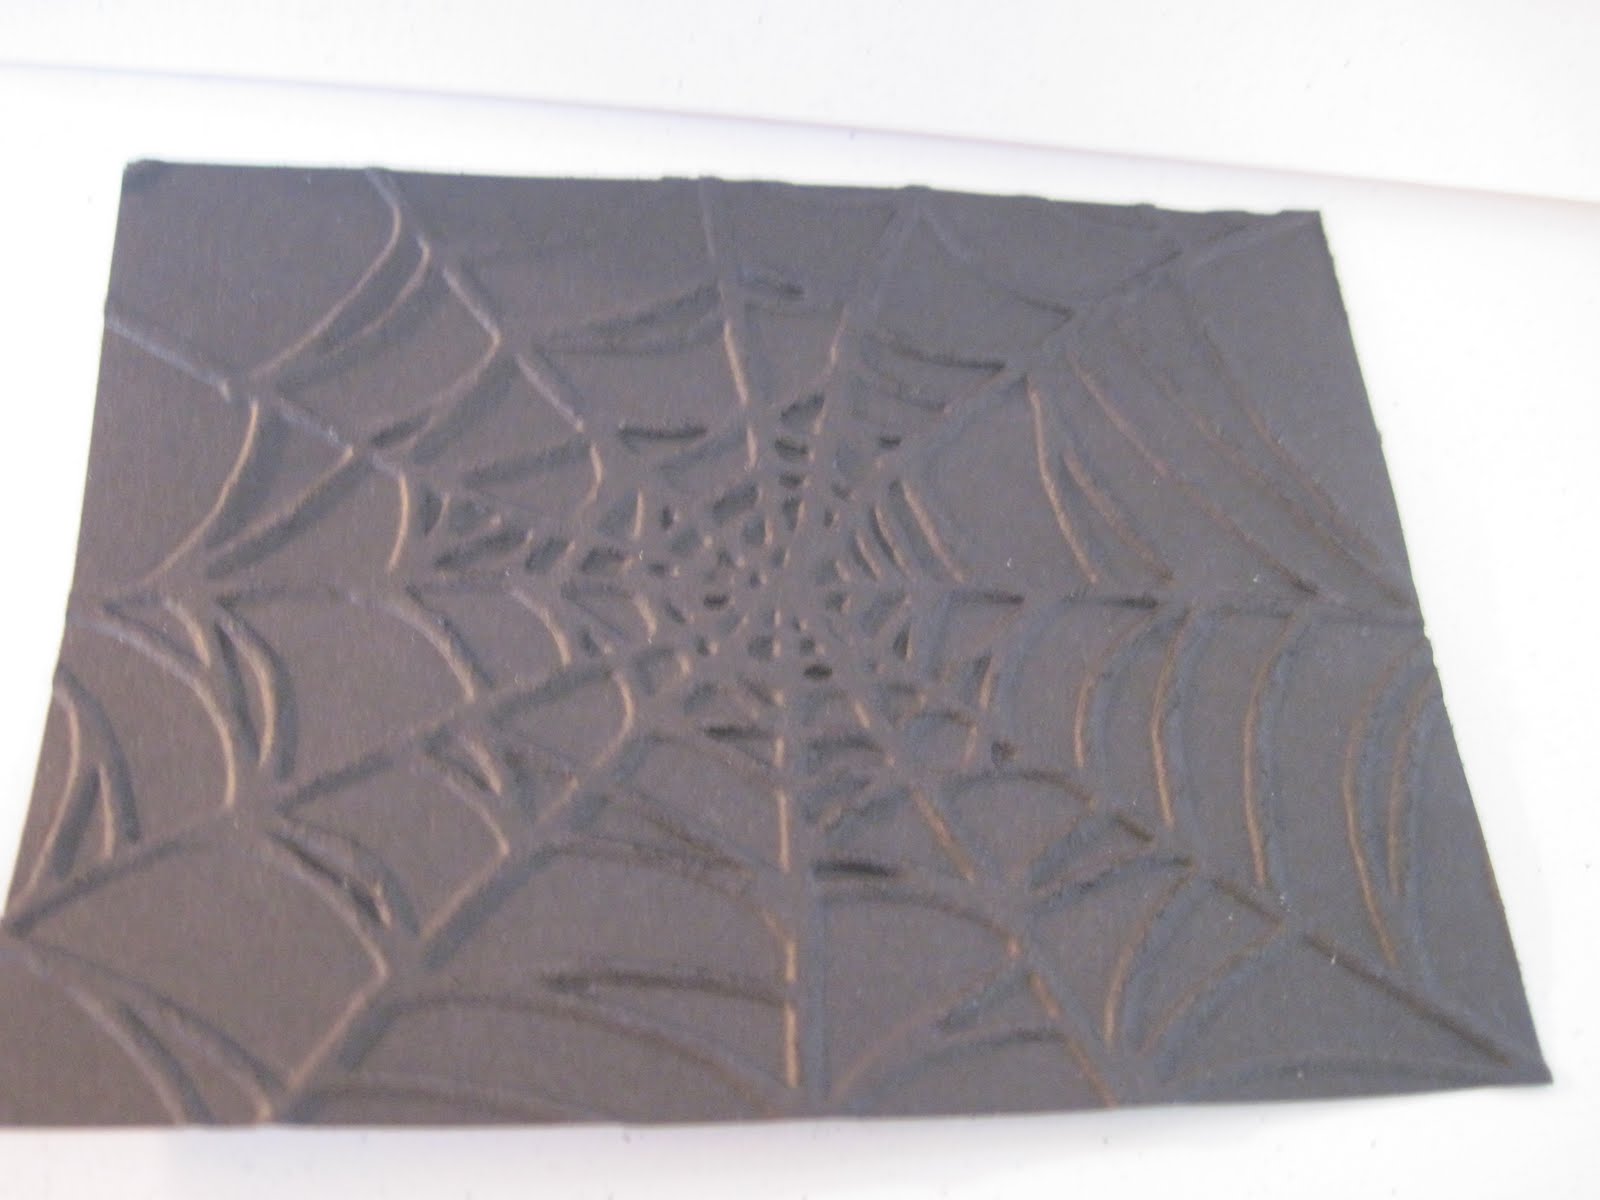
Today I'm using my new brayer technique on this Halloween card. Isn't serendipity great? First run a piece of black cardstock through the Big Shot using the Spider Web embossing folder in the Holiday Mini. It will look like this.


You'll notice the the ridges of the spider web are facing up.
You want to turn the cardstock over so you get the obverse, the ridges need to be facing your protected work surface.


You can see that the creases are facing down.

Now, ink up your brayer with Whisper White craft ink and roll it back and forth over the cardstock. You can re- ink if you need to, it didn't seem to make any difference with lines or anything. Then let it dry.
I don't know if you can heat set it. I brayered mine then left for a while so don't know how long it took to dry. It has a chalky texture that's kind of funky.

The little spider is from the stamp set Batty for You. He is stamped on Cajun Craze cardstock and I've used a couple of the black jewels in the Holiday Mini Catalog to make his eyes creepier. I also matted the circle with black cardstock, and tied a black lace ribbon (available in the Holiday Mini) at the top.

And there you have it, a creepy crawly Halloween card!
Have a great day,
Much love and joy,


http://stampinnscrappinwithkaren.blogspot.com/

Saturday, September 4, 2010

A update of free shipping weekend

The free shipping special is MY special, not a Stampin' Up! special so you must:
  1. Order through me
  2. The merchandise comes to my home
  3. You pick up the merchandise here.
Thanks for ordering! There are soooo many awesome stamp sets and accessories, I'm having a hard time choosing ... I want it all!

See you soon,
Karen


http://stampinnscrappinwithkaren.blogspot.com/

FREE SHIPPING WEEKEND! plus A Double Slider Blossom card

Good morning and Happy Labor Day Weekend!

I know I told you I was on the fly today and I am but I'll quick post a double slider card for you! Quick description. I used Aways Artichoke and So Saffron cardstock. THe flowers are painted with Watercolor crayons.

For those of you waiting .... SU has experienced some delay with crayons. Apparently the company that manufactured them built a new location and only recently went back into production. We're hoping to hear something soon, but still haven't heard an availability date. Thanks for your patience.


This is the card in its open state. It looks lopsided because it's nearly impossible to take a picture of it standing up! LOL.


  • Open your card the long way so the fold is on the bottom and the open portion is at the top.
  • Stamp your background on the front
  • Take the Word window punch an go in as far as you can from the left side. Punch the window
  • Move the punch slightly to make your window longer and punch again.
  • Approaching the card from the right side do the same, lining it up with the holes on the other side so they're directly across from each other.
  • Punch 4 circles with the 1/2 inch circle punch.
  • Put a Stampin' Dimensional on two of them and put them on the inside of the card so the sticky part of the dimensional comes through your word window.
  • Adhere the other dots on the front side of the dimensional. This is your sliding portion
  • STick the bottom portion of your small insert (in this case, the blossom defiinition) onto the dots with more adhesive, I like mini glue dots here.
  • Open the card and line up the large portion (with the flowers and bee in this case) of the card and use glue dots to stick it to the very back of  the 1/2 inch dots.
  • Adhere the front portion with just flowers in place on the front to hide the word window slots.
  • I used the little slot punch to attach the ribbon along with a brad.
  • You'll notice I sponged the background of each art piece wit a very light blue.
  • SCS has a tutorial with photos too if you're interested.
It's a FREE SHIPPING weekends. Email your order to me (or call) by Monday at 5:00 p.m. and you qualify for free shipping on your order! Contact me soon!

Have fun and we'll see you soon,
Much love and joy,


http://stampinnscrappinwithkaren.blogspot.com/

Friday, September 3, 2010

Embossing Folder Brayer Technique

Good morning,

Our card today features the new Vintage Wallpaper, the Square Lattice embossing folder and the new Pear Pizzazz ink. The card is pretty self explanatory except for coloring the embossing portion.

First run your piece of Whisper White cardstock through the Big Shot with the wallpaper folder. Then take it out and lay it on your protected work surface upside down. What I mean by that is, lay it down so the raised images are on the bottom, you want the part in between the images to be the raised portion you're going to color.

Ink up a brayer in Pear Pizzazz and roll it over the image, back and forth, until you get the uniform color you want. Then mat it in black.

The next piece of Whisper White is run through the Big Shot using the Square Lattice embossing folder. I left mine white but you could certainly ink yours up too.

I discovered this technique just playing around and it's waaaaayyyy easier than inking up an embossing folder.


This is the greeting using the thank you stamp from Just Because I Care, a Level I hostess set. The sentiment is stamped on white and punched out with the Word Window punch and matted in pear with the Modern Label punch. I accented it with the Filigree Designer brad and some satin ribbon.

That's it! So fast and easy and the look is MY style of vintage!

Have a great day. Check in on Sunday. I have a full schedule tomorrow so am giving myself the day off blogging ... unless I stamp ... then I'll blog .... I'm hopeless!

Much love and joy,


http://stampinnscrappinwithkaren.blogspot.com/

Thursday, September 2, 2010

Blue and Olive Baroque Kindness

Good morning everyone,
I've been using Baroque Motif a lot lately again and this card is one of my favs. I made it using Soft Sky (Baja Breeze or Bashful Blue would both work too) and Old Olive. The stamped image uses the same colors on Whisper White cardstock.

I put a strip of olive cardstock at the bottom of the white and pierced it in a double row. You may have to expand the photo to see the piercing, I'm not sure. I stamped the letter Kk from the Defining Alphabet in blue then stamped the corresponding definition from the Define Your Life set (Kindness) The word 'kind' came from the Baroque Motifs set.

I tied a 5/8 inch grosgrain ribbon at the top and I was done! This card, btw, is cut the long way so the fold is at the top.

Have a great, if rainy, day.
Much love and joy,


http://stampinnscrappinwithkaren.blogspot.com/

Wednesday, September 1, 2010

Mirror Image Fall Trees

Good morning,

I hope the days finds you healthy and happy.

Today I've got a mirror image card for you. The cardstock is Soft Sky but you could easily use Baja Breeze. I used More Mustard and Whisper White as well.

I stamped the Lovely as a Tree image onto the cardstock in Always Artichoke. Then I inked the stamp again and stamped my Stamp-a-ma-jig. While the ink was still wet I flipped the image and set it down on the cardstock, gently rubbing to make sure I got each image. I also offset the trees just a little in the "water" image.

The trees were sponged with various yellows, oranges and reds and the grounding near the tree bases was sponged lightly with artichoke ink.The sky was sponged very lightly with the cardstock blue. With a mustard ribbon and the word Autumn, my card was done.

That's it for today! See you tomorrow!
Much love and joy,

http://stampinnscrappinwithkaren.blogspot.com/

Tuesday, August 31, 2010

Baroque Motif with Shadowing

Good morning stampin' pals,

This card uses River Rock and Wild Wasabi ink. The cardstock is the stame with the addition of Very Vanilla.

I first stmaped the image from Baroque Motifs with River Rock. Then, using the Stamp-a-ma-jig, I loved the image over a little and stamped wasabi, a variation on the shadow technique.I stamped River Rock on the River cardstock and Wasabi on the wasabi belly band.

Vanilla taffeta ribbon and antique brads in the cut out flowers from the set finished it off. One of the flowers was stamped full strength and the other was stamped off once. The center was river rock and punched out with the 1/2 inch circle punch.

Hope you have a wonderful day!
Much love and joy,


http://stampinnscrappinwithkaren.blogspot.com/

Monday, August 30, 2010

Bunch o' Bugs

Good morning everyone,

Here's a card using Wild Wasbi, Pacific Point and Pumpkin Pie. The DSP is leftovers. I took my cutting tool and laid the DSP on my cutting mat, I swirled a cut, which was amazingly easy then mounted the paper with a slight gap. Bugs and Kisses is the stamp set. I used Hodgepodge Hardware for the greeting.

I love this little bug set. It's so great for scrapbooking boys.

Take care,
Much love and joy,

http://stampinnscrappinwithkaren.blogspot.com/

Sunday, August 29, 2010

Pirate Invitation

Good morning!

So sorry I didn't check in yesterday, life got in the way, you know?

Today, I'm showing you a birthday invitation made with Ahoy Matey (RET). The image was stamped in StazOn ink and colored with Stampin' Write markers, then bled with an aquapainter. The card fold is unique as well. Here is a pic of the inside.


This is the inside middle. I stamped a light image of the ship in the background and the information labels to the side.


This is the top portion of the inside


This is the bottom of the inside and held three "Pieces of Eight" that could be redeemed for pirate treasure at the party.
All in all, everyone loved the pirate themed party. It was silly and fun!

I promise, I'll stamp soon and get some more current sets on the blog. I've been so insanely busy that stamping just hasn't been an option with the new colors. I don't really know how to blend them yet, I need to work with them for a while.

Have a great day!
Much love and joy,

http://stampinnscrappinwithkaren.blogspot.com/

Friday, August 27, 2010

Sending Warm Thoughts

Good morning my stampin' pals,

This is a card I made for a loved one using the Wandering Words set. I colored the set with Stampin' Write markers and huffed on it. It's laid done on Whisper White cardstock, double matted with Chocolate Chip and Crumb Cake. The base cardstock and DSP are Ruby Red, one of my fav reds.

The ribbon is 5/8 inch chocolate chip grosgrain. The card is a 3x6, one of my favorite sizes.

Again, easy easy easy!

Have a great day,
Much love and joy,


http://stampinnscrappinwithkaren.blogspot.com/

Thursday, August 26, 2010

Welcome Christmas

Good morning stampers,

This card is another easy one. It uses Black StazOn, Pacific Point and Pink Pirouette Ink. I masked the bottom of the Whisper White cardstock and put the pink on with a sponge. Then I tore another post it to cover the center portion of pink.

I sponged the blue on  then stamped the tree grouping. I removed the post-its and stamped on the final pine tree and the sentiment. The card was Pacific Point and the mat is Basic Black.

That's all there is to it. Maximum impact, minimum work!

Have a great day!
Much love and joy,

http://stampinnscrappinwithkaren.blogspot.com/

Wednesday, August 25, 2010

Fall Trees


Good morning!

It's absolutely gorgeous today and I have to work all day .... sniff sniff. At least I love my work.

Today I'm felling a little fall-ish. This card uses Close to Cocoa, Elegant Eggplant and Whisper White. I stamped the Lovely as a Tree image in Mellow Moss, More Mustard and Elegant Eggplant with moss grass and cocoa tree trunks.

I colored the rubber stamp with Stampin' Write markers then "huffed" on the inked stamp to remoisten I stamped the image then used two way glue to dot on the tree and glitter (RET) from SU.

The ribbon is Elegant Eggplant 1/4 inch grosgrain and I added a small piece of silver cord sold in last years holiday mini.

All in all, a very fall-like image.

Have a great day and we'll see you tomorrow for another project.
God bless,
Much love and joy,

http://stampinnscrappinwithkaren.blogspot.com/

Tuesday, August 24, 2010

Sweet Centers Halloween Treats

Good morning,

I'm making sweet treats! This one is made with Rich Razzleberry textured cardstock, Basic Black and Whisper White. The fun fill is actually granola with craisins. The punches for the greeting (stamped with Teeny Tiny Wishes) is the word window and the designer label punch. The ribbon is black gingham (RET) and the brad is Old Olive as is the feature art which is stamped with the Sweet Centers stamp set. What fun!


The next one uses Only Orange (Tangerine Tango would probably work), Basic Black and Whisper White cardstock. The fill is Halloween M&Ms. I matched the Lovely Lilac grosgrain ribbon to the candy color, IRL it matches perfectly. Kiwi Kiss would've matched the green candy better but I used Old Olive ink to stamp the main image. I was on a roll with it.  All that was topped off with a little black organza (RET).

Once again, friends. You can substitute color, ribbon and cardstock. I'm just not wealthy enough to trash all my retired supplies and move on to all the new color. I did purchase all the new color but will keep using the old until all my cardstock and DSP is used up. I'm sure you understand.

I'm kind of torn between using it up and moving on ... and being save-y with it because I'll never see it again. I know some of you are matching your cardstock to other papers. You can certainly ring in on it here. I did write to Stampin' Up! and mentioned your wishes for a new family with the older colors. I also gave them your wish list for stamps. I bet I'm their favorite flavor right now. ;-) but I wanted them to know how their customers feel.

I will not be using retired colors and the like for classes and clubs. I want you to be able to duplicate projects but for my blog, my board and cards I send I will use up my old supplies. BAD demo, right? It is, what it is.

Have a great day!
Much love and joy,


http://stampinnscrappinwithkaren.blogspot.com/

Monday, August 23, 2010

Inspired By Nature Embossed

Good morning,

Boy, the colors on this card just didn't show up well. The cardstock is Mellow Moss and the DSP is Always Artichoke. I stamped the image from Inspired by Nature on the DSP using VersaMark. I used white embossing powder and heat set the image.

A little WW taffeta ribbon and a filigree brad and voila! Tis done. As you can see, I'm into fast, easy and fun!

Take care and see you tomorrow,
Much love and joy,

http://stampinnscrappinwithkaren.blogspot.com/

Saturday, August 21, 2010

Vintage Vogue Cajun and Gray


Good morning,
Here's another vintage look for me. I've got Cajun Craze, Newsprint DSP and Basic Gray going here. I stamped images from Vintage Vogue on the background and on the newsprint in Cajun as well. I made sure that some of the images were stamped off to give it a different look.

I stamped the flower, cut it out and secured it with an antique brad. Then I stamped the sentiment on twill tape with basic gray ink and adhered it with a brad.

You know me, easy peasy is the way to go.
Take care and have a fantastic day,
Much love and joy,

http://stampinnscrappinwithkaren.blogspot.com/

Friday, August 20, 2010

May Birthday Calendar Page

Good morning,

Here is our final calendar page. It's done in Cameo Coral and Old Olive. I stamped the image from Bella Blossom four times and cut various parts to layer it (you can see it on the sample), then I dyed Whisper White taffeta ribbon with the coral ink. With a coral mat and a second mat in green I was done.

The most time consuming part, of course, was the cutting. But well worth it, I think! Especially for something you use every year. The months were all stamped with the Full Calendar stamp set.

Hope your day is filled with flowers and fun!
Much love and joy,
Karen


http://stampinnscrappinwithkaren.blogspot.com/

Thursday, August 19, 2010

April Birthday Calendar page

Good morning,

Here is the April birthday calendar page. Everything except the stamp is SU. the colors are Real Red, Summer Sun and Really Rust for the little girl. The water and mat are Bordering Blue, a go-to color for me. I stamped the image in StazOn on Watercolor paper and used Stampin' Write markers to color. I bled the color with aquapainters.

The overlay is from a DSP set called Night and Day and I secured it with Bordering or Ballet Blue brads (I can't remember which). I thought it kind of looked like rain. I may have posted the card version of this little gal back in May. The sentiment on the card was "Friends are the umbrellas in the storms of life."

Hope you all have a great day! I need to run some errands and pick up a spoon I forgot somewhere last night! Honestly, I should just go out a buy a few more but alas, I don't NEED them, you know?

Take care,
Much love and joy,

http://stampinnscrappinwithkaren.blogspot.com/

Wednesday, August 18, 2010

March Birthday Calendar Page

Here we are with the March Birthday Calendar page. The stamp set is from a hostess set called Country Morning. It's on natural cardstock, mounted on Really Rust and then on Crumb Cake. I stamped the sentiment on the Crumb Cake along the Rust mat on the right side. I'm not sure you can see it.

I used Blender Pens and squished Classic ink pads for the coloring. Some Very Vanilla taffeta ribbon and a mini library clip finished it off!

Join me tomorrow for another project!
Much love and joy,

http://stampinnscrappinwithkaren.blogspot.com/